62 lines
2.7 KiB
Markdown
62 lines
2.7 KiB
Markdown
|
|
# Inspeckage Tutorial
|
||
|
|
|
||
|
|
**Tutorial copied from** [**https://infosecwriteups.com/genymotion-xposed-inspeckage-89f0c8decba7**](https://infosecwriteups.com/genymotion-xposed-inspeckage-89f0c8decba7)\*\*\*\*
|
||
|
|
|
||
|
|
### Install Xposed Framework <a id="ef45"></a>
|
||
|
|
|
||
|
|
1. Download Xposed Installer APK from [here](https://forum.xda-developers.com/attachments/xposedinstaller_3-1-5-apk.4393082/)
|
||
|
|
2. Download Xposed Framework zip from [here](https://dl-xda.xposed.info/framework/sdk25/x86/xposed-v89-sdk25-x86.zip)
|
||
|
|
3. Download Inspeckage v2.4 APK from the github repo [here](https://github.com/ac-pm/Inspeckage/releases)
|
||
|
|
|
||
|
|
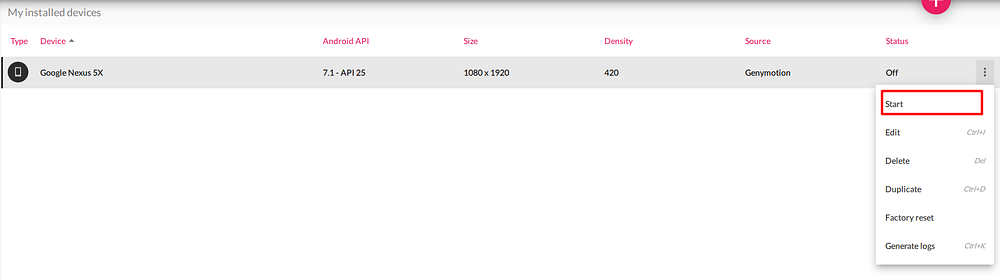
Start the Virtual Device from the menu
|
||
|
|
|
||
|
|
|
||
|
|
|
||
|
|
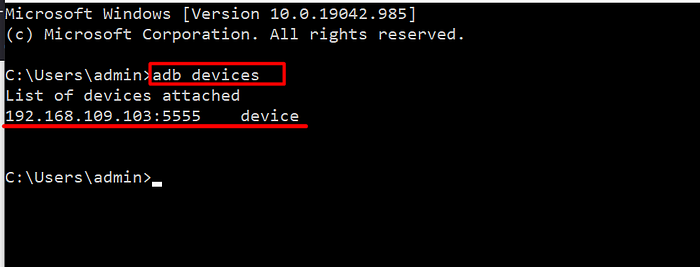
Make sure the device is online for adb
|
||
|
|
|
||
|
|
|
||
|
|
|
||
|
|
Drag and drop the Xposed framework zip file \(`xposed-vXX-sdkXX-x86.zip`\) to your virtual device display to flash the device.
|
||
|
|
|
||
|
|
Drag and drop Xposed Installer APK \(`XposedInstaller_*.apk`\). This should install and launch _Xposed Installer_ application. At this stage, it will display that the Xposed framework is installed but disabled:
|
||
|
|
|
||
|
|

|
||
|
|
|
||
|
|
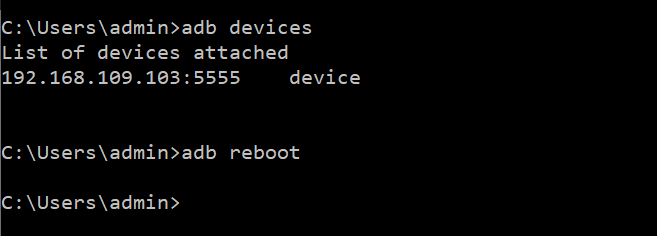
Reboot the device with `adb reboot` command. **Do not reboot from** _**Xposed Installer**_ **as this will freeze the device.**
|
||
|
|
|
||
|
|
|
||
|
|
|
||
|
|
Launch _Xposed installer_. It should display “Xposed Framework version XX is active”
|
||
|
|
|
||
|
|

|
||
|
|
|
||
|
|
Drag and drop the Inspeackage APK \(app-release.apk\) to your virtual device display to install the app.
|
||
|
|
|
||
|
|
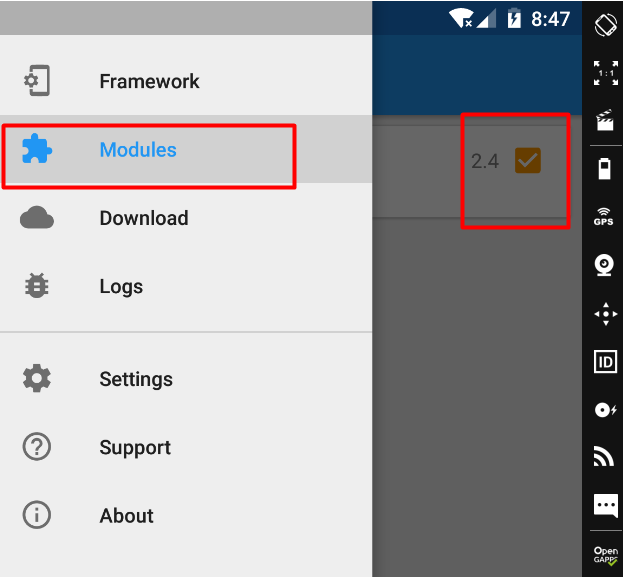
After installing, Go to Xposed Installer → Modules→ Activate the Module → reboot via adb
|
||
|
|
|
||
|
|
|
||
|
|
|
||
|
|
### Dynamic Analysis with Inspeckage <a id="7856"></a>
|
||
|
|
|
||
|
|
After, Successful installing of Inspeckage and Xposed Installer. Now we can hook any application with Inspeackage. To do this follow the below steps
|
||
|
|
|
||
|
|
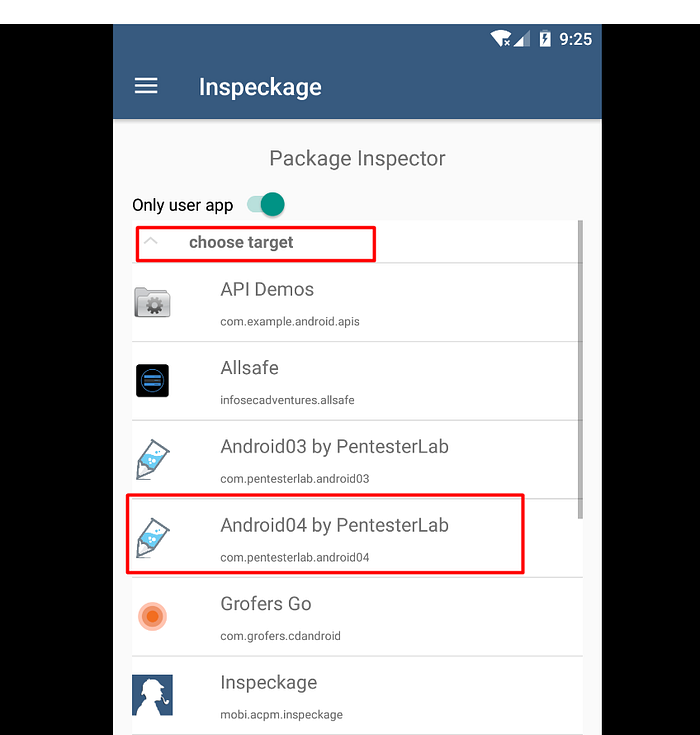
1. Launch the Inspeckage Application from the application drawer
|
||
|
|
2. Click on the “Choose target” text and select the target application
|
||
|
|
|
||
|
|
|
||
|
|
|
||
|
|
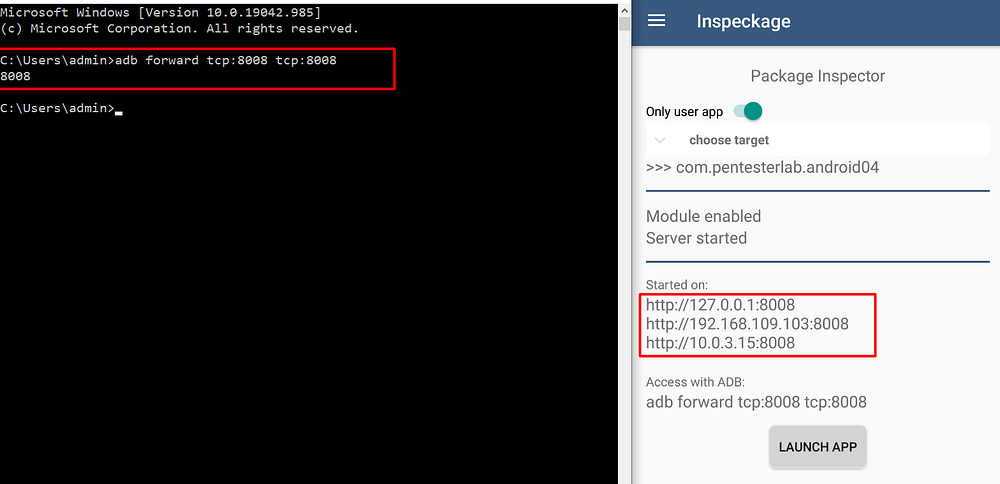
3. Then forward VD local-host port to main machine using adb
|
||
|
|
|
||
|
|
```text
|
||
|
|
adb forward tcp:8008 tcp:8008
|
||
|
|
```
|
||
|
|
|
||
|
|
|
||
|
|
|
||
|
|
4. Now click on the “**LAUNCH APP**” Button and then visit [`http://127.0.0.1:8008`](http://127.0.0.1:8008/)
|
||
|
|
|
||
|
|
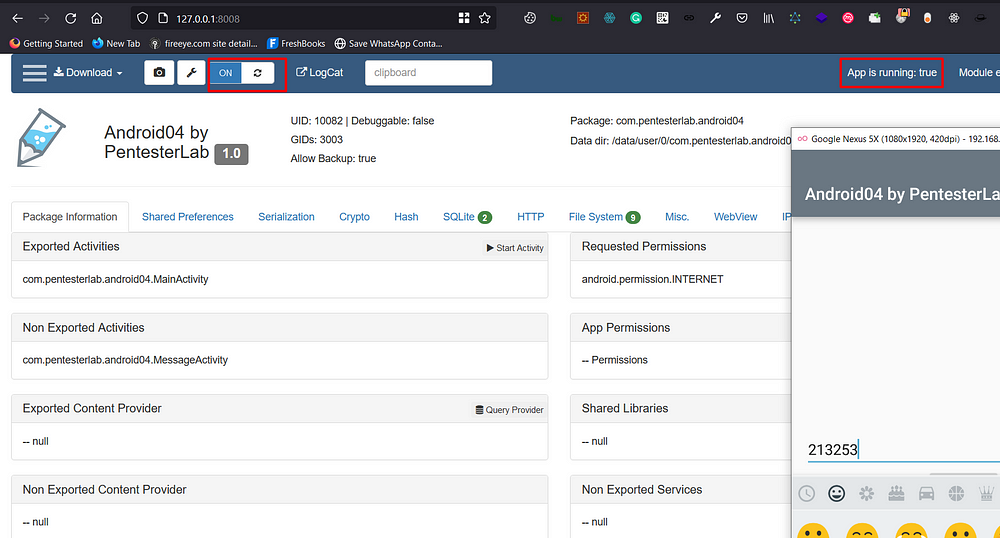
5. Now click Turn On the button to Inspect the app. \(make sure `App is running:` status should be **True** before you “Turn On”
|
||
|
|
|
||
|
|
|
||
|
|
|